Good afternoon lovely viewers! Rob and I decided to tackle a Do-It-Yourself (DIY) project this morning...let's just say that we should not be allowed access to blow torches. Seriously. Those things are dangerous, and we are too much like children to be handling them without supervision. Anyways! As always, we are here to provide you guys with insight on how to be prepared for the coming months of horribly dreadful conditions. Feel free to thank us in the comment section below, no pressure...
DIY Pinecone Fire Starters

This project is all about fire. Sure, you can run over to your local grocery store to pick up a fire starter log, but where is the fun in that I ask you? Nowhere to be found. With this DIY life lesson, you can make a fire starter with things you've probably already got laying around your house or yard. The materials used:

Pine Cones
These are free, and work just as well as your fire starter logs. If you do not live in a place that has a surplus of pine trees...Florida I'm looking at you...don't hesitate to run over to Michael's and grab yourself a bag. It's fairly inexpensive for the amount of pine cones you receive.
Yarn or String
You will use this to wrap around the pine cone. It makes for easy dipping (this will be explained later) and also happens to be really cheap. If you aren't near a Michael's, I know Walmart carries yarn at super discounted prices.
Wax
This will make your pine cones water proof and also help keep the fire burning longer. It takes a while for the flame to melt through each layer of wax completely, and depending on what kind of wax you use, you can make them as colorful or as scented as you like. Feel free to use candle wax, beeswax, etc; personally, Rob and I melted down crayons to save on the cost of this project, which gave our fire starters a colorful twist. Use what you've got!
Paper Towels or Napkins
You need this to wrap your pine cone up! Your pine cone will have a wick on it, but the added paper element will just help to get the pine cone burning all over and helps the process along. If you don't have any paper on hand, feel free to just burn the wick you make out of the yarn.
Container For Wax
We used a paper plate with a coffee filter put on top to melt down our wax in the microwave. This is because we are broke as jokes and only wanted to use things we found in the office for free. If you are melting the wax on the stove, you will just need to dip your pine cone in your pot, no need for other dishes. You can also use a microwaveable bowl, tupper-ware, anything that will allow you to dip your pine cones into the wax.
And that's it, guys! This is all it takes to be able to start your own fire. Stash a few of these in the emergency kits you make for your home and your car; they go a long way for such cheap materials. So let's get down to the process:
WRAP YOUR STRING AROUND THE PINE CONE
It doesn't need to be perfect, the wax will stick it in place, but I tried to make sure I was getting the string tucked underneath some of the...leaves? Fronds? We actually have no idea what the little prickly pieces of the pine cone are called. If anyone else knows, feel free to enlighten us! Anyways, if you need a better reference to what I'm talking about, take a look at the image below:

Now you'll just need to cut your string when you've got enough wrapped around so there is at least an inch of string up top. This creates your wick.

This is what it looks like finished. Hooray! Seriously guys, I am a perfectionist, do not feel the need to make this string as pretty as I did.
BREAK DOWN AND MELT YOUR WAX
It was a battle between us and the crayons...somebody had to go. If you are using crayons like we did, you can choose to make these pretty or resourceful. We peeled off the papers on the crayons, but in hindsight realized that any extra paper in a fire starter isn't going to hurt. Make sure you're keeping in mind that these are supposed to help you build a fire, not sit on your mantle. If your end product looks a little crazy, relax. It's better to be safe than sorry if you ever have to use these things. Comfort should be the main priority, not looks! Don't follow in our footsteps (at least not for this step).


DIP OR ROLL YOUR PINE CONE IN THE MELTED WAX
This step is where it starts to get messy. If you do get wax on yourself, don't fret. Once it cools it is really easy to brush off. Our fingers are a little green from the crayons we used, but what's a little finger stain in the name of emergency preparedness? We marched on, and now the odds will be ever in our favor if we need to start a fire because of it.
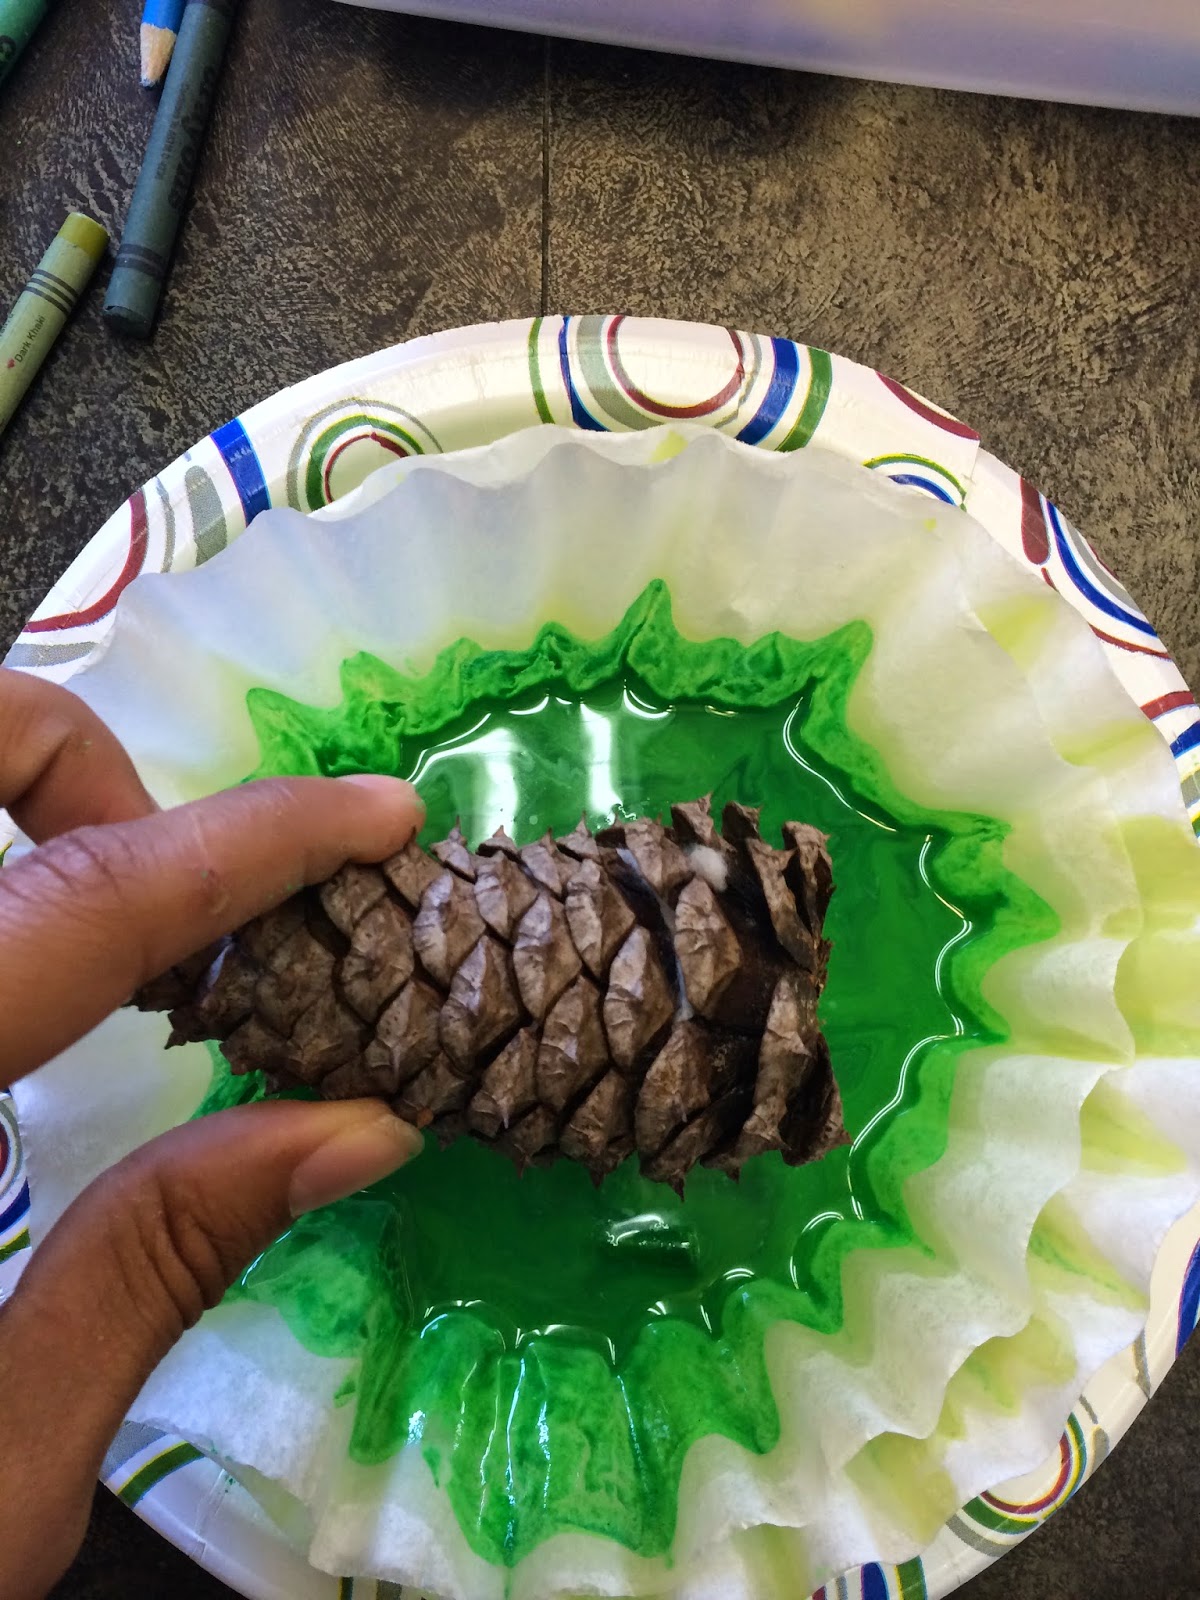


If you are able to produce enough melted wax where you can fully dip your pine cone in and hold onto it from the top of the wick, go for it! Like I said, we had very limited resources to make this tutorial. You can also use tongs to dip and submerge the whole pine cone if you are doing this on the stove. Your options: roll pine cone in small amount of wax like we did, dip pine cone by wick if you more wax that will allow you to submerge the whole cone, or dip the pine cone using tongs if you are working on the stove near a hot surface. Capeesh?
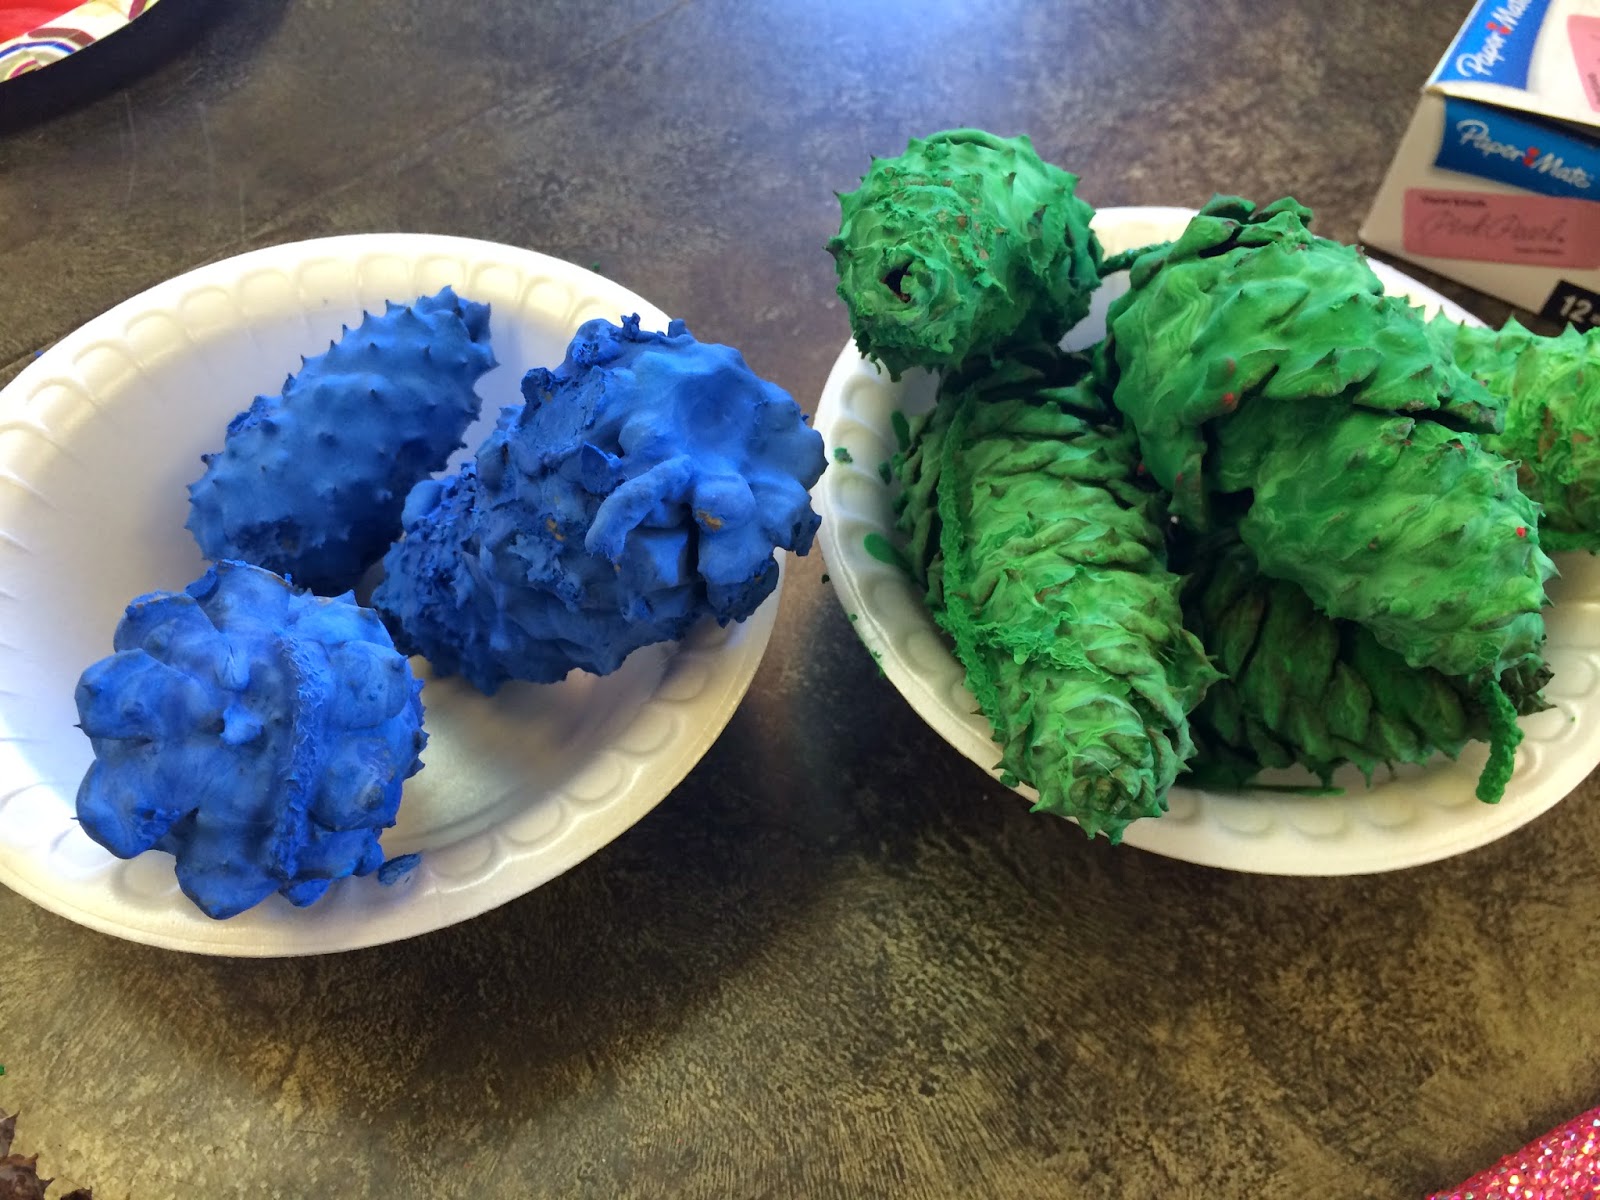
LET YOUR PINE CONES DRY
This step is really easy, the wax takes only a minute or so before it is fully dry. Just set your pine cones off to the side somewhere, you can use a multitude of objects as drying racks. You could even use a drying rack, but if you don't have one of those lying around, go for a plate, a bowl, etc.
I know, I know. I'm disappointed with the quality of this shot as well. I'm the perfectionist in the group, I have to make sure everything is exactly perfect and beautiful, and perfect. Rob is very much so laid-back, easy, doesn't mind if things go wrong, etc. We try to balance each other out, but mainly we just get frustrated..Still love him though! (If you're reading this, Rob, I love you to pieces.)
Onwards!
SEND IN THE FIRING SQUAD
SEND IN THE FIRING SQUAD
No, not that firing squad. These bad boys are ready! We decided to put them to the test, since this was originally something we discovered on Pinterest. Pinterest has lovely photos, but there is a reason that there is a whole website dedicated to Pinterest fails. Sometimes things just don't turn out like they should. (Seriously, if you've never heard of the website for Pinterest fails, please click here. You will thank me for this after you get your ab workout in from laughing so hard.)

We wrapped our pine cones in paper towels for extra strength in making sure our fire got going. As stated earlier, as long as you made a wick at the top of your pine cone, you do not technically need the paper. We used it for reinforcement, but the pine cone itself is perfectly capable of being flammable on its own.

Wrap it up nice and cozy, oh yeah!

This is where things got scary. Rob with a blow torch is something I hope you guys never have to witness in person. You might lose your eyebrows. PLEASE use matches, small lighters, anything but a blow torch!

Burn baby burn, disco inferno!
(I'm a riot, I know.)

And there you have it, folks! You just made yourself a fire. Do you feel proud? Is there a warm, fuzzy feeling inside as you're lighting up this pine cone? If this is the case...you might want to talk to someone about that, this world does not need any more arsonists! Let's stick on feeling warm and fuzzy from the outside; but seriously, this pine cone can give off some heat! You will be pleasantly surprised.
If you guys feel like watching this video that Rob and I made of us actually lighting the pine cone, take a gander down below. Ignore the last ten seconds, a man walked by us in the parking lot, and let's just say we couldn't ignore the smell. Anyways, thanks for tuning in, we'd love to hear your feedback!
Sending good vibes your way,
Tiara and Rob
Great job!
ReplyDelete